Unlocking the Invisible World: A Practical Guide to Thermal Diagnostics
It starts with a mystery. A client complains of a “ghost draft” in their newly renovated living room—an elusive chill that comes and goes, with no obvious source. The windows are new, the insulation is supposedly top-notch, yet the feeling persists. You could spend hours guessing, cutting into drywall, or you could pull out a tool that gives you a new sense. You power it on, point it at the wall, and suddenly, the invisible becomes visible. A dark, feathery plume of blue streaks down from the ceiling, originating from a poorly sealed attic hatch. Mystery solved in a matter of moments.
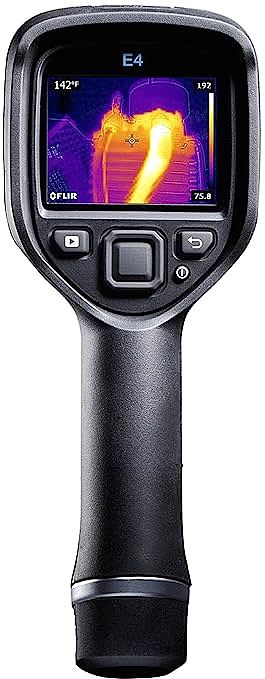
This isn’t science fiction; it’s the power of thermal imaging. A device like the FLIR E4 is not just a fancy thermometer—it’s an extension of your senses, allowing you to perceive the world of heat energy that flows around us, through us, and from every object. But like any new sense, it requires learning a new language to interpret what you’re seeing correctly.
This guide is designed to be your field manual for that language. We’ll use the popular and accessible FLIR E4 compact camera as our example tool, but the principles you’ll learn are universal. Our goal isn’t to review a camera; it’s to teach you a skill that will make you better at your job, whether you’re a home inspector, an electrician, a building contractor, or a serious DIYer.
The 2-Minute Guide to Speaking “Thermal”
Before we pull the trigger, we need to understand the ‘grammar’ of the world we’re about to see. What you see on a thermal camera’s screen is a visual representation of infrared radiation, not a direct measurement of temperature. The camera’s sensor detects this energy and translates it into a color map, but to make that translation accurate, you must grasp two golden rules.
The Golden Rule: Emissivity
Imagine two coffee mugs, both filled with equally hot coffee. One has a matte black finish, the other is shiny stainless steel. A thermal camera will show the black mug as glowing hot, while the steel one might appear deceptively cool. Why? The answer is emissivity. It’s a measure of how efficiently an object radiates thermal energy, on a scale of 0 to 1.
High-emissivity materials (like wood, drywall, brick, painted surfaces, human skin – typically with a value around 0.95) are like honest communicators; they efficiently radiate their heat, so what the camera sees is very close to their actual surface temperature. Low-emissivity materials (like polished metals, shiny plastics – with values as low as 0.1) are poor radiators. They’re like shy communicators; they hold their heat in, so the camera sees very little radiation, leading to drastically underestimated temperature readings.
- Quick Start Tip: For most building and home inspections focusing on non-metallic surfaces, leaving the camera’s emissivity setting at its default of 0.95 will get you reliable results. But the moment you need to measure a shiny copper pipe or an aluminum bus bar, you must be aware of this effect. A common professional trick is to place a small piece of high-emissivity tape (like simple electrical tape, with an emissivity of ~0.95) on the metallic surface to get an accurate reading.
The Deceiver: Reflections
The second rule is that low-emissivity surfaces aren’t just poor radiators; they are excellent reflectors of thermal energy. That shiny steel mug isn’t just hiding its own temperature; it might be reflecting the thermal signature of your warmer face, making it look like the mug has a mysterious hot spot. In the field, a technician might mistake the reflection of a hot overhead light on a cool electrical panel for a dangerous connection.
- Field Tip: Always change your viewing angle. A true hot spot will stay put on the component, while a reflection will move or change as you move, just like a reflection in a mirror.
So, now that you understand the basic ‘grammar’ of the thermal world, let’s look at the specific features of our chosen tool, the FLIR E4, and see how its technology helps us translate that grammar into clear, actionable insights.
Decoding the Image: Your Guide to the Tech That Matters
A thermal camera is more than its sensor; its onboard technology is designed to help you make sense of the data. Here’s what you need to know.
Resolution (80×60): What It Means in Practice
The FLIR E4 has an 80×60 resolution, meaning it has 4,800 pixels. Don’t compare this to your smartphone camera. This isn’t for taking pretty pictures; it’s for collecting diagnostic data. This resolution is more than capable of identifying an overheating breaker in a panel from a few feet away, or spotting a 16-inch wide section of missing insulation in a wall. The key is to understand its effective range—get close enough to your target for the problem area to cover at least a 3×3 pixel area on your screen for reliable measurement.
The Superpower: MSX® Multi-Spectral Dynamic Imaging
This is where the magic happens and what sets FLIR cameras apart. An 80×60 thermal image can look blurry on its own. MSX is a patented technology that uses the E4’s built-in 640×480 visual camera to detect the edges and outlines of objects in the scene and embosses them onto the thermal image in real-time. The result is a dramatic increase in clarity and context. You don’t just see a vague hot blob; you see that the heat is coming from a specific screw on a specific outlet. It eliminates the need to constantly cross-reference with a separate visual photo, speeding up your workflow immensely.
Measurement Tools: Center Spot vs. Area Box
The E4 offers several ways to measure temperature. The two most useful are the Center Spot, which gives you a precise reading of whatever is in the middle of your screen, and the Area Box, which can be set to find the automatic maximum or minimum temperature within a defined rectangle. Use the spot meter for pinpointing a specific connection. Use the area box when you want to quickly scan a larger area, like a bank of circuit breakers, to find the hottest one without having to hunt for it manually.
Technology is impressive, but it’s useless without application. It’s time to put on our gear, take our newfound knowledge and powerful tool, and step into the real world. Here are three common missions you’ll likely face.
Field Report: Three Missions, One Thermal Camera
Mission 1: The Energy Detective (Building Envelope)
- The Problem: A client is complaining of high energy bills and drafty rooms. Your mission is to find the hidden pathways where energy is escaping.
- How-to: For best results, there should be a good temperature difference (at least 10°C / 20°F) between inside and outside. On a cold day, scan interior walls, ceilings, and floors. Missing or compressed insulation will appear as colder (blue/purple) patches. Pay close attention to corners, window and door frames, and electrical outlets, where air leaks often show up as dark, feathery streaks. Thermal bridging, where heat conducts through less-insulated materials like wall studs, will appear as a faint, regular pattern of vertical cold lines.
- What to Document: Always capture both the MSX thermal image and a standard visual photo for your report. Note the indoor and outdoor temperatures to provide context for the severity of the findings.
Mission 2: The Fire Watcher (Electrical Systems)
- The Problem: An electrical system, especially under load, can present fire hazards at its weakest points. Your mission is to find these hot spots before they fail.
- How-to: Scan electrical panels, junction boxes, and motor controls while they are under normal operating load. A healthy system should be thermally uniform. You are looking for anomalies—a single circuit breaker, wire, or connection that is significantly hotter than its neighbors. A good rule ofthumb, based on industry standards, is to investigate any connection that is significantly hotter—say, 15°C (27°F)—than similar components under the same load. This often indicates a loose or corroded connection, which creates resistance and dangerous heat.
- What to Document: Capture an image of the hot spot alongside a similar, normal-temperature component for comparison. In your report, be sure to note the load conditions of the system at the time of the inspection, as this heavily influences the temperatures.
Mission 3: The Leak Seeker (HVAC & Moisture)
- The Problem: A hidden water leak or an underperforming HVAC system. Your mission is to find the source of the moisture or inefficiency.
- How-to: Water, through evaporation, makes surfaces cooler. Scan walls and ceilings below bathrooms or rooflines for unusually cool, often amorphous-shaped, areas that could indicate trapped moisture. For HVAC, you can quickly verify that air is coming out of all vents, check for duct leakage in attics or crawlspaces (which will appear as hot or cold spots), and trace the lines of in-floor radiant heating to ensure all loops are functioning.
- What to Document: Trace the outline of the suspected moisture with your thermal image. For HVAC, document the temperature of the air coming out of a vent compared to the ambient room temperature.
Knowing the Limits: What They Don’t Always Tell You
After seeing what this camera can do, it’s easy to feel like you have superpowers. But like any good professional, it’s crucial to know your tool’s weaknesses.
- The Shiny Object Problem: We have to repeat this: measuring the temperature of bare, shiny metal is extremely unreliable without proper knowledge of emissivity and reflected temperature compensation. Don’t trust the temperature reading from a shiny copper bus bar unless you’ve used the electrical tape trick or have adjusted advanced settings in the camera.
- It’s Not X-Ray Vision: A common misconception is that thermal cameras can see “through” walls. They cannot. They see the surface temperature of the wall. A stud finder works because the stud has a different thermal mass than the insulation around it, causing it to heat and cool differently, which results in a subtle surface temperature difference that the camera can detect.
- The Software Workflow: While the E4 is a great field tool, getting images off of it can sometimes be a bottleneck. As some user reviews note, the Wi-Fi connectivity to mobile apps can be finicky. The most reliable method is often connecting it via USB to a computer and using the FLIR Tools software to import, analyze, and create reports. Be prepared to incorporate this step into your workflow.
- When You Might Need More: The E4’s 80×60 resolution is a great starting point. However, if your job requires you to inspect small components from a safe distance (e.g., an overhead power line connection from the ground), you would need a camera with a higher resolution and likely a telephoto lens to get the necessary detail.
Conclusion: From Seeing Heat to Making Smarter Decisions
We’ve journeyed from understanding the grammar of the thermal world to deploying our new sense on real-world missions. You’ve learned that a tool like the FLIR E4 is not about capturing pretty, colorful images. It’s about capturing data.
By understanding its principles of operation and its limitations, you transform it from a simple camera into a powerful diagnostic instrument. The true return on investment for a thermal camera isn’t just in the problems you find; it’s in the confidence it gives you. It’s the ability to show a client exactly where the problem is, to justify a repair with objective evidence, and to diagnose issues that would otherwise be pure guesswork. You’ve learned not just how to see heat, but how to use that vision to make smarter, faster, and safer decisions.