
Beyond the Hype: What a Sub-$200 Thermal Camera Actually Shows You
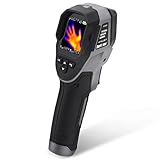
It’s an alluring promise, isn’t it? For less than the price of a high-end power tool, you can acquire a new sense—the ability to see the invisible world of heat. Gadgets like the HURRICANE Thermal Imaging Camera, and dozens of others like it plastering online marketplaces, dangle the superpower of thermal vision in front of homeowners, DIY enthusiasts, and the tech-curious. They offer a peek behind the curtain of reality, a chance to spot drafts, overheating circuits, or hidden leaks before they become disasters. The dream is compelling.
But then, you scroll down to the user reviews and encounter a starkly different reality. For every glowing five-star review, there’s a frustrated one-star rating complaining of blurry images, questionable accuracy, and an experience that feels more like a toy than a tool. This chasm between expectation and reality raises the crucial question: what does a sub-$200 thermal camera _truly_ show you? To answer that, we need to dissect one of these budget marvels, using the HURRICANE camera as our specimen, and decode what its specifications actually mean in the physical world. This isn’t just a review; it’s a guide to understanding what you’re really buying into.

The Great Pixel Gulf: Why “1024 Pixels” Isn’t What You Think
The product page for our example unit proudly states a resolution of “32 x 32, 1024 pixels.” In an age where our phone cameras boast millions of pixels, “1024” might still sound somewhat substantial. It’s not. Let’s place this number in context, because this single specification is the most important factor determining your experience.
The most critical specification for a thermal imager is its thermal resolution—the number of individual detector points it uses to create an image. A higher resolution means more detail and a clearer picture. The 32×32 grid of the HURRICANE camera gives it 1,024 total pixels. Now, consider a professional-grade, entry-level camera like the FLIR C5, which is often a benchmark for contractors. It features a 160×120 resolution, which translates to 19,200 pixels.
That is not a small difference. The professional camera is capturing 19 times more thermal data.
| Camera Tier | Typical Resolution | Total Pixels | Analogy |
|---|---|---|---|
| Budget / Entry | 32 x 32 | 1,024 | 1980s 8-bit Video Game Sprite |
| Pro Entry-Level | 160 x 120 | 19,200 | Modern Desktop Icon |
| Professional | 320 x 240 | 76,800 | Standard Definition Video |
| High-End | 640 x 480 | 307,200 | High Definition Video |
To visualize this, imagine an image of a house cat. A 32×32 thermal image is like rendering that cat in an 8-bit video game—you might make out a vague, blocky shape that suggests “cat-like object.” The 160×120 image, by contrast, is like a sharp desktop icon; you can clearly see the ears, the tail, and the body. The implication of this “pixel gulf” is profound: with a 1024-pixel imager, you are not looking at a detailed picture. You are looking at a coarse heat map, a smudgy grid of temperatures that can only show you large, obvious thermal differences. You might see that a window is colder than the wall next to it, but you’ll struggle to pinpoint the exact location of the drafty seal.
Decoding the Display: Color Palettes and the Illusion of Accuracy
So, the image is a coarse grid of 1024 thermal dots. But how does the camera turn those dots into the colorful images we see on screen? This brings us to the world of color palettes and the deceptive nature of temperature readings.
The HURRICANE camera offers three palettes: rainbow, iron oxide red, and black and white. It’s crucial to understand that these are simply different ways of visualizing the same, limited data. A rainbow palette might assign vibrant blues to cold spots and hot reds to warm spots, making the image look dramatic. However, it doesn’t add any more detail than a simple black-and-white (grayscale) view. The underlying 32×32 data grid remains the same. Think of it as applying a colorful Instagram filter to a very blurry photo; it changes the mood, not the content.
Furthermore, the wide temperature range, often advertised as a key feature (e.g., -4°F to 1202°F / -20°C to 650°C), can be misleading. While the sensor might be able to detect temperatures across this spectrum, its ability to measure them _accurately_ is a different question entirely. Accurate temperature measurement depends on a factor called emissivity—an object’s efficiency in emitting thermal radiation. A dull, black wall has high emissivity (around 0.95), while a shiny piece of metal has very low emissivity. Most budget imagers have a fixed emissivity setting (usually around 0.95). Pointing it at your black wall might give you a reasonably close reading, but pointing it at a shiny copper pipe will give you a temperature reading that is wildly inaccurate, as the sensor is capturing more reflected heat from the surroundings than the heat emitted by the pipe itself.
The Unspoken Specs: What Budget Cameras Conceal
If resolution is the story budget cameras tell, then thermal sensitivity and frame rate are the chapters they conveniently leave out.
Thermal Sensitivity (NETD): Measured in millikelvins (mK), NETD (Noise Equivalent Temperature Difference) is arguably as important as resolution. It describes the smallest temperature difference the camera can detect. Think of it as the camera’s ability to see subtle shades of “thermal gray.” A lower NETD is better. Professional cameras typically have an NETD of ≤50mK. A camera with that sensitivity can detect the faint coolness of a wall stud or the subtle warmth left by a handprint. Budget cameras often don’t list this spec because their NETD is much higher (e.g., >100mK). This means they are “thermally nearsighted”—they can see big, obvious temperature changes like a hot stove, but subtle issues like minor moisture behind drywall or a small insulation gap will be completely invisible to them.
Frame Rate: This is how many times per second the image updates, measured in Hertz (Hz). You’ll notice many consumer-grade thermal cameras have a frame rate of less than 9Hz. This isn’t just to save cost; it’s a strategic choice. Thermal cameras with frame rates above 9Hz are often subject to stricter international export regulations. By staying at or below 9Hz, manufacturers can ship their products globally with less paperwork. For the user, this results in a choppy, lagging video feed. It’s perfectly fine for looking at a stationary wall, but trying to scan an area quickly or track a moving pet will feel like watching a buffering video from the early 2000s.

The Verdict: A Brilliant Hot-Spot Detector, Not a Precision Imager
With a coarse resolution, questionable accuracy, and key performance metrics left unsaid, it might seem like these devices are useless. But that’s not the whole story. If we stop trying to force it to be a high-definition camera and instead understand its true nature, we can find its surprising, albeit limited, value.
The correct way to view a sub-$200 thermal camera is as a qualitative hot-spot and cold-spot detector. It’s a tool for answering simple, binary questions: “Is there a temperature difference here, yes or no?”
What It’s Genuinely Good For:
* Finding Obvious Drafts: Locating the general area around a window or door where a significant amount of cold air is entering.
* Locating Radiant Heat: Seeing the basic path of radiant floor heating pipes or finding hot water pipes in a wall.
* Spotting “Vampire” Electronics: Quickly identifying which power adapters and devices are drawing power and generating heat, even in standby mode.
* Fun and Exploration: Checking for even heat distribution in a pan, seeing which parts of your body are warmest after a workout, or finding your cat hiding in a dark room.
* Checking for Major Overheating: Seeing if a car engine, a motor, or a PC component is significantly hotter than its surroundings.
What It Struggles With (or Simply Cannot Do):
* Pinpointing Problems: It can show you a cold area on a wall, but it likely can’t show you the small, specific crack causing the draft.
* Detecting Subtle Issues: Finding minor moisture intrusion, small insulation gaps, or an electrical connection that is only slightly warmer than normal is beyond its capability.
* Accurate Temperature Measurement: Without adjustable emissivity, any temperature readings, especially on non-dull surfaces, should be treated as rough estimates.
* Professional Reporting: The low-resolution images are unsuitable for creating professional inspection reports.

Conclusion: Empowering Your Decision
So, is a sub-$200 thermal camera like the HURRICANE worth it? The answer is a resolute “it depends on your expectations.” The trade-off is clear: you are exchanging a very low price for massive compromises in resolution, sensitivity, accuracy, and features.
This tool is not a scam, but its marketing often sells a dream that its hardware cannot deliver. The decision to buy one should not be based on the hope of getting a professional tool for a hobbyist price. Instead, ask yourself what you truly need:
- If you need a tool to find the general location of a significant thermal anomaly, to satisfy a curiosity about the invisible world, or for educational purposes, then it might be a fantastic and affordable entry point.
- If you are trying to solve a serious problem—like diagnosing a critical electrical fault, finding a slow water leak to prevent mold, or proving an insulation defect to a contractor—then this tool is not only inadequate, it could be misleading. In those cases, investing in a higher-resolution model from an established brand is not a luxury; it is a necessity.
Ultimately, the best purchase is an informed one. By understanding that you are buying a “thermal spotter” rather than a “thermal imager,” you can align your expectations with reality and turn a potential disappointment into a genuinely useful, if limited, addition to your toolkit.